

Get rid of mobile ads with a Raspberry Pi Zero and Pi-hole
10 May 2020Online Advertising
I hate ads.
I don’t think I have ever clicked on an ad on purpose. I have clicked on many ads accidentally, because sometimes it is just hard to navigate your way through all this noise and deceptive content-like advertising. I like to think that each click I make on an add by mistake makes the ad business a little bit more irrelevant. Because yes, it is irrelevant.
I can’t help thinking that there must be a better way to run the internet than advertising. In my experience, people will often support the concept of online advertising with considerations like:
“But how could these small websites survive without advertising ?”
This is just the opposite of thinking out of the box. We live in an ad-fueled ecosystem so of course, it’s not easy to think of alternatives.
But in the end, who wants to see ads ? who likes ads ?
Nobody.
Many people, like me, use an ad-blocker when they are browsing the web on their laptop. That does the job pretty efficiently.
However, we are powerless when it comes to blocking ads on our smartphone.
On iOS, Safari lets you use a third-party ad-blocking app, called a content blocker.
I’m not using Safari, but anyway this will not block in-app ads which are by far the most annoying ones. Think about the splash screen that you see sometimes for several seconds when you launch an app, or this video that will pop up once in a while. Not only is this annoying but it also slows down the apps.
Is there anything you can do about that?
Yes there is, and a simple solution is to use Pi-hole.
Pi-hole
When you browse the web or when one of your mobile apps interacts with a remote server, your mobile asks a DNS server to resolve domain names (like adrienball.fr) to actual IP addresses, because in the end that’s what is required to identify a machine on the internet.
To do that, DNS servers store some sort of big tables which map domain names to IP addresses. If you try to access an unknown website, the DNS server won’t find any entry in its tables and will return an NXDomain (“Non-Existent Domain”) response.
Let’s say you run your own DNS server on your local network, and this server keeps a blacklist of domain names that are known to correspond to advertising or analytics requests. Now, let’s say that this DNS server returns NXDomain responses1 to all requests corresponding to blacklisted domain names, and just forwards all the other requests to a standard DNS server, like the one you have been using so far without being aware of it.
Now let’s say you tell your smartphone, or any device you use at home, to use this DNS server instead of the one it’s currently using.
Well, you would kill all the ads, everywhere.
This is precisely what Pi-hole is about.
Pi-hole is an open source DNS sinkhole which comes with a builtin, and quite exhaustive, blacklist of domain names associated to advertising, tracking and analytics. Even though the Raspberry Pi was at the center of the project at its beginning, which is why it’s called Pi-hole, it can run on many different clients as it’s pretty lightweight and portable.
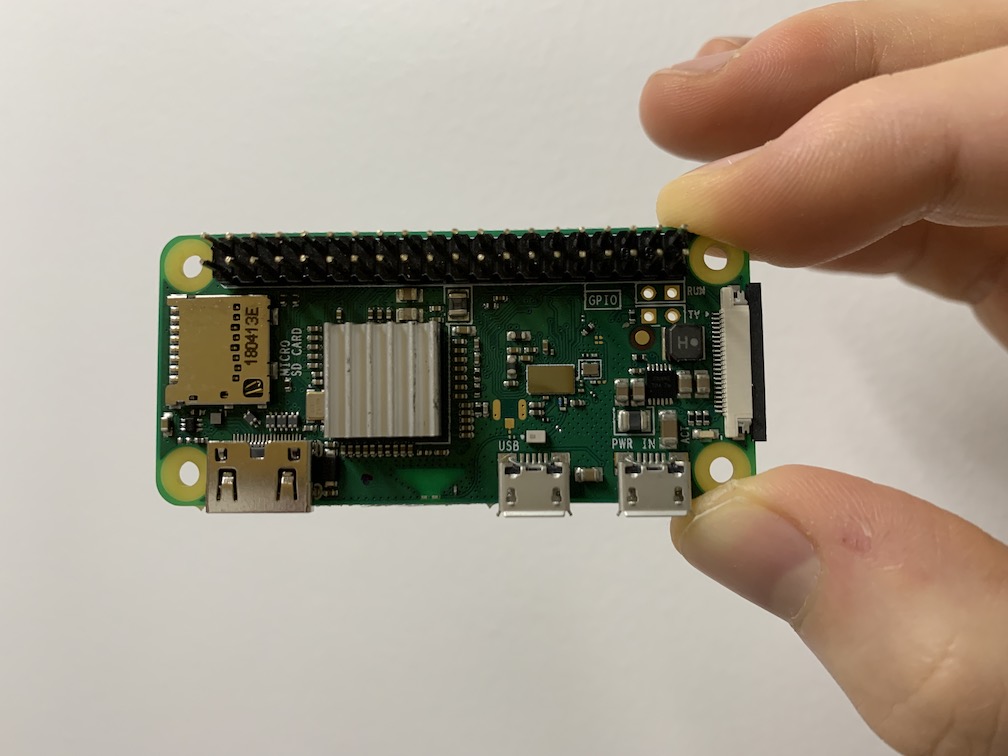
At the time I discovered Pi-hole, I had some DIY kit at home which included a Raspberry Pi Zero. This device is the smallest of its family, literally.
It’s also the cheapest one as it costs only 10$ ! Actually, the initial Rasperry Pi Zero was originally released at the price of 5$, but this version did not include WiFi and Bluetooth capabilities.
On the other side, one can struggle to find an interesting way to leverage it given its limited power.
Well, running Pi-hole on a Pi Zero proved to be one of the best use cases I could think of. I was initially concerned about performance but after several weeks relying on it, I can’t see any performance decrease.
The initial setup is simple:
- flash a Raspbian Stretch or Buster image on your Pi Zero
- install Pi-hole with
curl -sSL https://install.pi-hole.net | bash
That’s it, the Pi-hole DNS server is running on your Pi Zero. But now you need to actually use this server instead of the standard DNS server your device is using. At this point you have to retrieve the local IP address of your Pi. Then you have multiple options, I will only mention two of them:
- configure your router so that it uses the Pi Zero as its DNS server
- do not change your router configuration, and instead manually set the DNS server on your smartphone
The advantage of the first option is that anyone will benefit from Pi-hole as soon as they are connected to your local network. That may or may not be what you want depending on the situation.
I went for the second option and changed the DNS used by my iPhone when connected to the WiFi. This way, it doesn’t affect any other device in my home and anyone connected to the network can decide individually whether he’s into Pi-hole or not. I can still quickly deactivate Pi-Hole just by turning off the WiFi and falling back to cellular.
I chose this option because I anticipated that some apps or websites may not behave properly if they can’t reach their ad / analytics server.
It turns out I haven’t had any such issue so far but still, I prefer to let each device make its own choice.
Now that you have setup the DNS server on your mobile, the ads are … gone! No more ads anywhere on your mobile! Don’t look for them, they aren’t there anymore :)
This feels good. I love how Jacob Salmela described this magical moment in the original Pi-hole blogpost:
It’s one of those things that is difficult to describe and more something you need to experience.
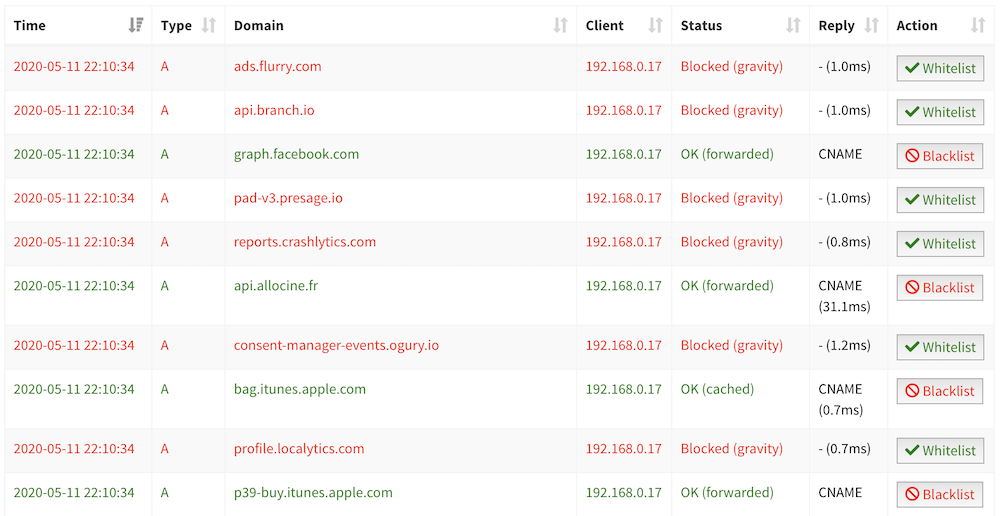
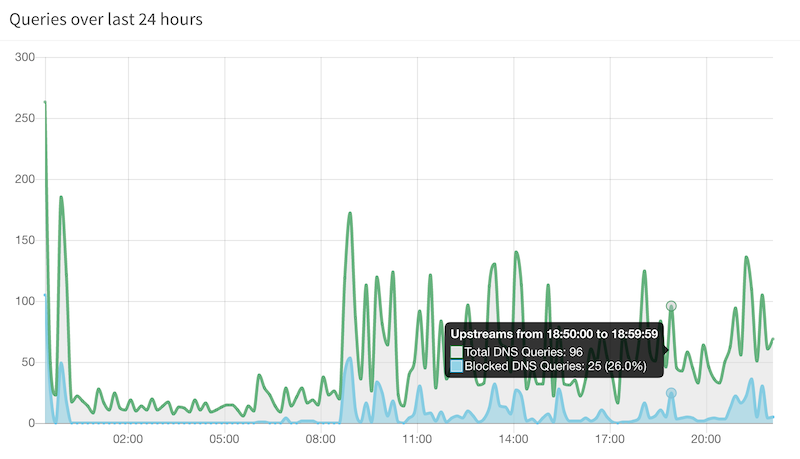
An interesting feature of Pi-hole is the dashboard it provides. It shows stats on all the domains being queried on your network. That’s a great tool to investigate your apps, and distinguish the bad guys from the good guys.
Remember that all this is powered by this 65mm long device. Isn’t it wonderful ?
Happy hacking!